|
1. Introduction
For each product (fuel, tolls, insurance renewal, rego renewal etc) and each supplier (Eg Shell, RMS, CGU) you need to configure the import routine beofre importing files.
This is essential so that AusFleet knows how to read the data correctly.
It also allows you to choose which information to import, over and above the basic, mandatory data.
This is normally a once-only task and changes only need to be made if your suppliers alter their file format.
The example below uses "Fuel" as an example, but the process is the same for all product types.
If in doubt, contact AusFleet Help Desk for advice.
2. Import Configuration
Transactions>>Import Files>>Configure Imports>>Fuel
Example of a Fuel File Configuration
Step 1 - Enter Header Information
Choose the correct tab (Fuel/Tolls/Renewals) and click "Add new configuration".
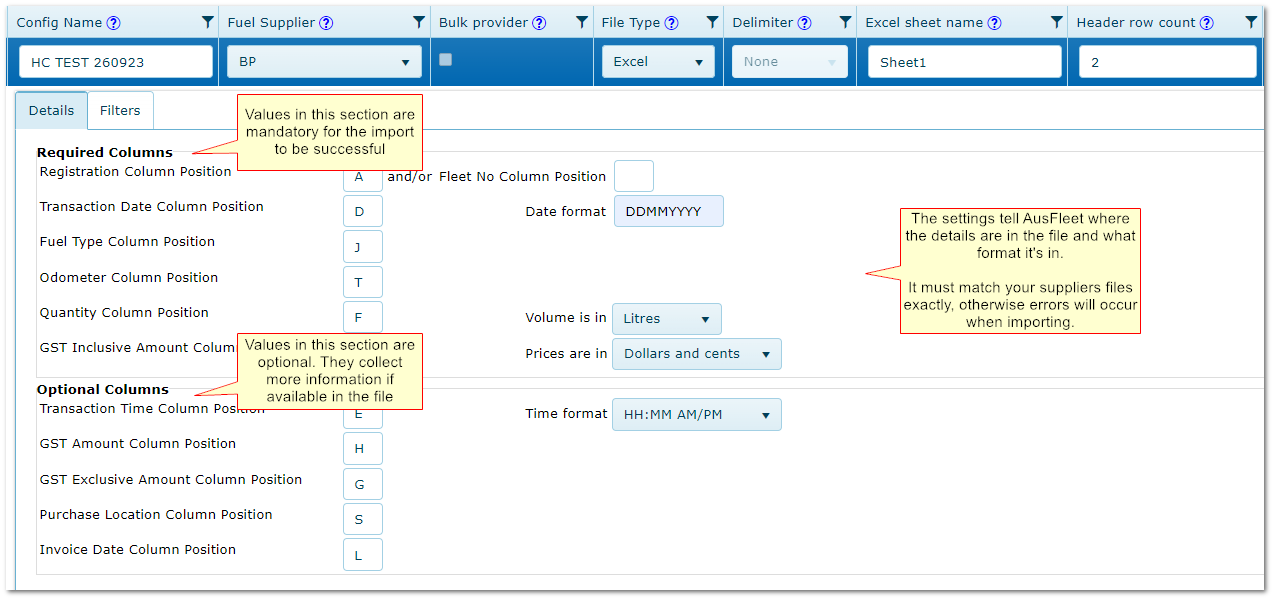
Enter the header information as follows.

Note: Other product types do not have "Bulk Provider
|
|
For special cases only.
Not required unless you have been specifically told how to use it by AusFleet Support.
|
|
|
If you no longer need to use the configuration, tick "Suppressed" to hide it from selection menus.,
Configurations can be changed if suppliers change their file formats (e.g. adding extra header rows, changing the delimiter type) but this is useful if you no longer use a particular supplier.
|
|
|
When finished, click Update to save the details and continue to step 2.
|
Step 2 - Set Up Details to be Imported
After completing step one, you can enter the details below.
For Toll and Renewals, the values will be different but the process is exactly the same.
You can create multiple configurations for each supplier if their file formats change month by month e.g. sometimes a supplier may use txt and csv
|
|
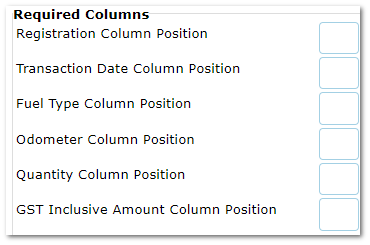
The values in this section are mandatory for AusFleet to correctly process the file.
Open the file in Excel (csv and txt files can be opened in Excel).
Do not save txt and csv files as Excel files.
Enter the column letters corresponding to the values.
E.g. Transaction date is in column B, Fuel Type in in column Q etc.
You can enter fleet number or registration or both depending what the file contains.
|
|
|
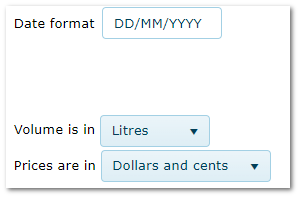
Confirm the date format used in the file.
E.g. DD/MM/YYYY, MMM/DD/YYYY, DDD/MMM/YYYY
Confirm the volume units used in the file.
Are purchase volumes shown in litres or millilitres?
Confirm currency format used in the file.
Dollars and cents = 45.30
Cents only = 4530
|
Optional Columns
|
Repeat the steps above for the optional section if you want to collect additional
data from the file.
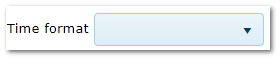
If you want to collect transaction time, you also need to
confirm time format used in the file.
|
You are now ready to import files for the supplier you have configured.
Step 3 - Choosing Rows Not to be Imported
This is optional but can be used to ignore selected rows based on the value in any column. E.g. If you do not want to import columns which contain admin charges.
1.Name the filter
2.Choose which column the value is in
3.Choose the operator
In the example below "NotEqualTo" means AusFleet will only import rows which do not not contain "Admin" in Column E

2. Deleting Import Configurations
Deletions cannot be undone.
Use the Delete button to remove individual configurations.
Configurations can only be deleted if it has not been used.
If there are existing imports, "Suppress" the configuration to hide it when importing files.
|